The Ultimate Guide to Exterior Paint Preparation: Ensuring a Flawless Finish
I will be honest. I wouldn’t say I like painting, and I usually hire a professional or have my wife help me. However, we at ProClean perform a lot of paint preparation cleaning for local painting companies.
Painting the exterior of your home is a significant project that can dramatically improve its curb appeal and protect it from the elements. However, achieving a professional and long-lasting finish requires meticulous preparation. Skipping the prep work can lead to poor adhesion, premature peeling, and a less-than-perfect appearance. This guide will walk you through the essential steps and techniques for adequate exterior paint preparation.
1. Gather Your Paint Preparation and Painting Tools and Materials
Before starting, make sure you have all the necessary tools and materials. Here’s a checklist to help you get started:
– Pressure washer or garden hose with a spray nozzle
– Scrapers and wire brushes
– Sandpaper (various grits)
– Caulk and caulking gun
– Exterior spackle or wood filler
– Painter’s tape and drop cloths
– Primer (appropriate for exterior surfaces)
– Cleaning solution (trisodium phosphate (TSP) or a mild detergent)
– Protective gear (gloves, safety goggles, mask)
– Ladder or scaffolding
– Paintbrushes, rollers, and paint trays
2. Inspect the Surface
Begin by thoroughly inspecting the exterior surfaces you plan to paint. Look for areas that require repair, such as cracked, peeling, or blistering paint, damaged wood, loose siding, and mildew or mold growth. Mark these areas for special attention during the paint preparation process.
3. Clean the Surface
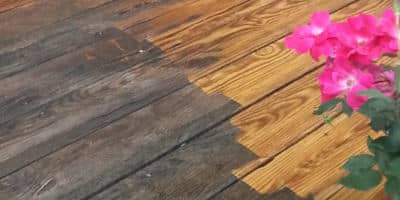 Cleaning is a crucial step in exterior paint preparation. Dirt, mildew, and chalky residue can prevent paint from adhering properly. Use a pressure washer to remove dirt and debris. If you don’t have a pressure washer, a garden hose with a spray nozzle and a scrub brush will work. For areas with mildew or mold, apply a solution of TSP or a mild detergent mixed with water. Allow it to sit for a few minutes, then scrub the surface and rinse thoroughly.
4. Remove Loose Paint
Although the pressure washer will remove most loose paint, a more detailed approach will still be needed. Once the surface is clean and dry, use a scraper or wire brush to remove loose, peeling, or blistering paint. Sand the edges of the remaining paint to ensure a smooth transition between bare surfaces and the old paint. To speed up the process, consider using a power sander for large areas. This step is a meticulous yet highly important paint preparation step.
5. Repair and Fill
After removing loose paint, inspect the surface for any cracks, holes, or damaged areas. Use exterior spackle or wood filler to repair these areas. Apply a high-quality exterior caulk with a caulking gun for larger gaps or cracks. Ensure that the caulk is paintable and suitable for exterior use. Allow the filler and caulk to dry completely according to the manufacturer’s instructions before sanding them smooth.
6. Sand the Surface
Sanding is essential to creating a smooth surface for the paint to adhere to. Use medium-grit sandpaper (80-120 grit) to sand the repaired areas and feather the edges of the existing paint. Once again, a power sander can be very effective for larger areas. After sanding, remove dust and debris using a brush or a damp cloth.
7. Protect Surrounding Areas
Before you start painting, protect areas you don’t want the paint to get on. Use painter’s tape to mask off windows, doors, trim, and other surfaces needing protection. Cover plants, walkways, and outdoor furniture with drop cloths or plastic sheeting.
8. Apply Primer
Applying a primer is a critical step, especially on bare wood, new wood, or areas that have been repaired. Primer helps the paint adhere better and provides a uniform base for the topcoat. Choose a primer suitable for exterior use and compatible with the paint you’ll be using. Apply the primer according to the manufacturer’s instructions and allow it to dry completely.
9. Final Inspection
Before applying the final coat of paint, thoroughly inspect the surface. Ensure all repairs are smooth, the primer is fully dry, and there is no dust or debris on the surface. This final paint preparation check will help you achieve the best possible finish.
10. Painting
With the surface properly prepared, you are ready to apply the paint. Choose a high-quality exterior paint designed for the specific material you are painting. Depending on the size and nature of the surface, apply the paint using a brush, roller, or sprayer. Follow the manufacturer’s instructions regarding drying times and the required coats.
Paint preparation conclusion
Proper preparation is the cornerstone of a successful exterior painting project. By following these steps, you can ensure that your paint job looks great and stands the test of time. Taking the time to prepare the surface meticulously will result in a durable, professional finish that enhances the beauty and value of your home.
At ProClean, we specialize in providing comprehensive pressure washing and soft washing services as part of our paint preparation process. Understanding the importance of a clean, debris-free surface for optimal paint adhesion, our team utilizes state-of-the-art pressure-washing equipment to effectively remove dirt, mold, and mildew. For more delicate surfaces, our soft washing techniques ensure thorough cleaning without causing damage, using eco-friendly detergents to eliminate contaminants safely. Our dedication to meticulous surface preparation guarantees a flawless, long-lasting paint finish, reflecting the high standards and professionalism that define ProClean.
Source: https://www.sherwin-williams.com/en-us/project-center/paint/how-to-prep-walls
You must be logged in to post a comment.